SCOUT Online: Tracks
Table of Contents
In order to build a vehicle track, select a required vehicle. You can select a vehicle finding it either on a map or in Units section in the left menu.
Building a track using Units section
Open Units and find the required vehicle in the table. Press Actions button and select Build track option (Figure 1). Then the page will switch to track display mode (see Figure 6).
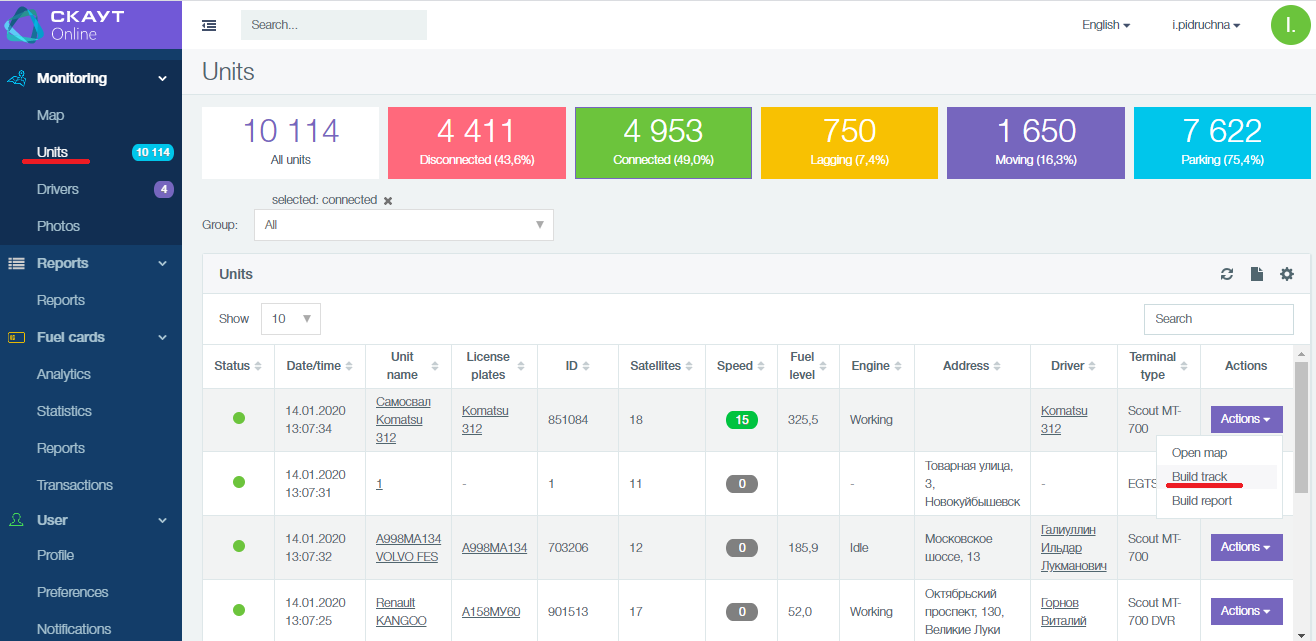
Figure 1 - Build track using Units section
Building a track using the map
If you select a vehicle on the map, the page will switch to track building page (Figure 2).

Figure 2 - Track building page
The track building page consists of the following elements:
- Current data panel (Figure 3);

Figure 3 - Current data panel
- Map toolbar (Figure 4);
![]()
Figure 4 - Map toolbar
- Vehicle information panel (Figure 5), which contains:
- status indicator (online, lagging, not connected);
- name, license plate;
- date and time of the last message;
- speed;
- fuel volume (if the vehicle does not have a fuel level sensor, then fuel consumption is indicated by a dash “-”);
- information about the driver (the driver is displayed as Unknown if they haven't been identified in a vehicle. If there were several drivers during the track period, they are displayed sequentially.)
- Report button with a drop-down list. On selecting the desired report, you be taken to the "Reports" page, in which this report and object will already be selected.
- Track button with options: “Today”, “Yesterday”, “Over the past 2 days”, “Select”.

Figure 5 - Object Information Panel
Track display mode
After that, the page will switch to track display mode (Figure 6).
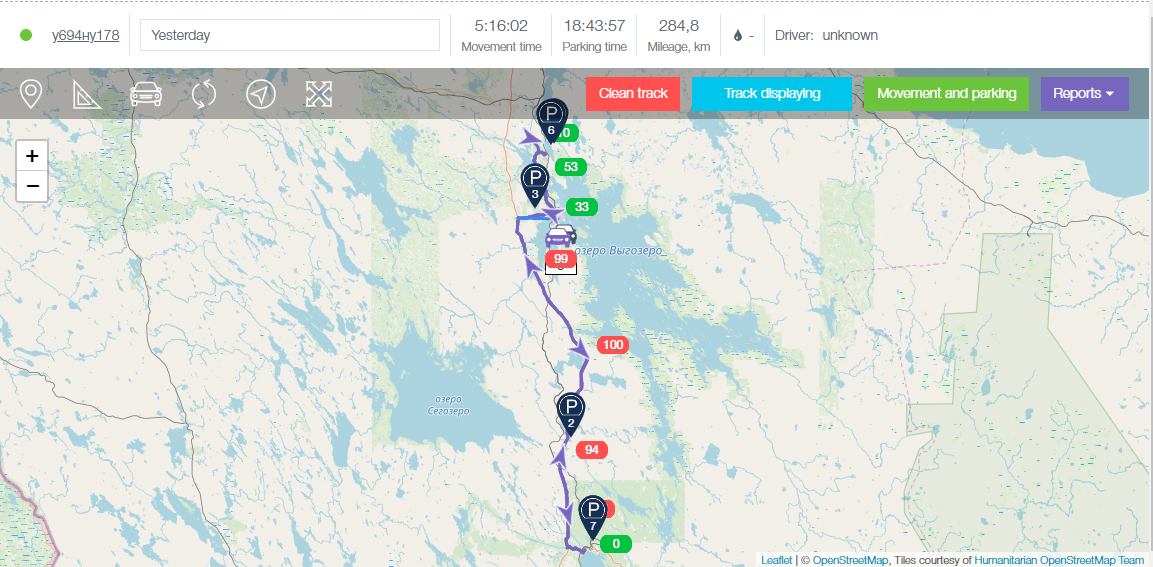
Figure 6 - Track display mode
After building the track, the following buttons appear:
- Clear track button deletes the track from the map, returns to track building mode;
- Track displaying button - when active, a opens a list with options Don't show parkings and Draw track (Figure 7):

Figure 7 - Track Display Submenu
Don't show parkings option enables you to see the track without parking icons (![]() )
)
Show parkings option enables you to see the track with parking icons. When the parking icon is clicked on, parking time and duration appears in vehicle information panel (Figure 8).
You can easily access information about other parking stops using buttons ![]() in the information panel, or finding and clicking parking buttons on the map.
in the information panel, or finding and clicking parking buttons on the map.
![]()
Figure 8 - Parking time and duration
Draw tracks enables you to color tracks according to the speed of the vehicle (Figure 9).

Figure 9 - Color tracks
The colored track is presented in Figure 10.
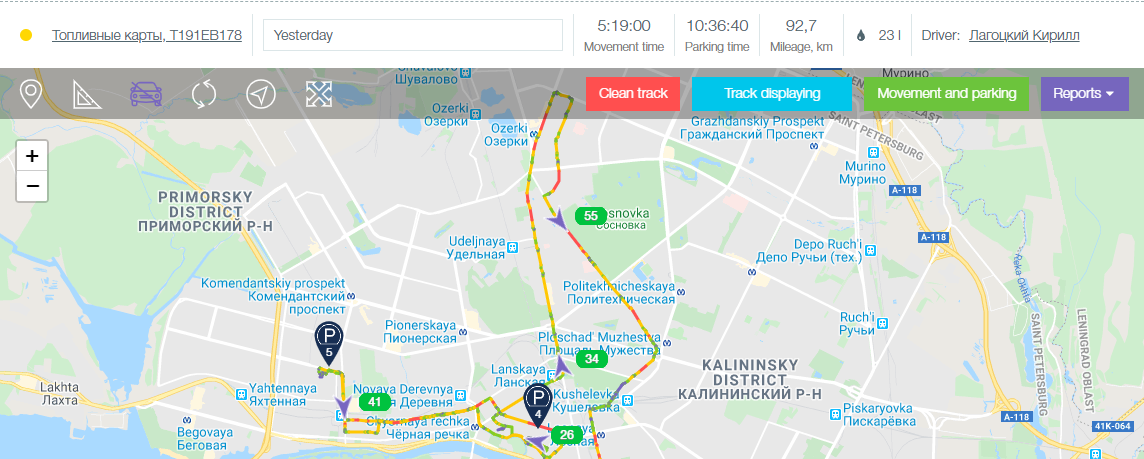
Figure 10 - Colored track
- Movement and parking button shows a report on time and duration of all parking stops (Figure 11).
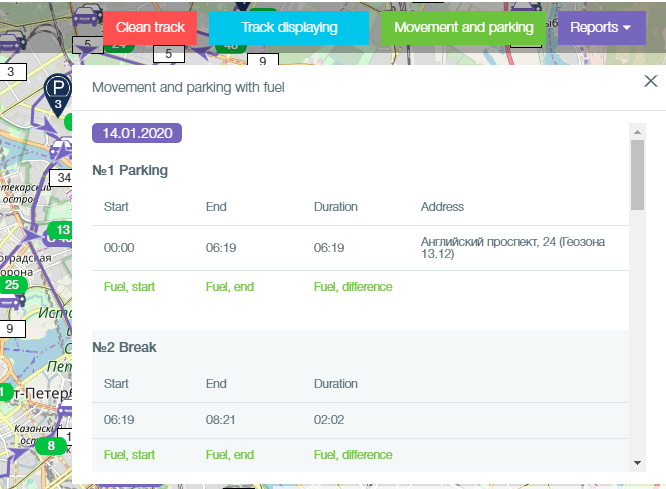
Figure 11 - Movement and parking
- Reports button opens a dropdown menu with report types to be built (Figure 12)
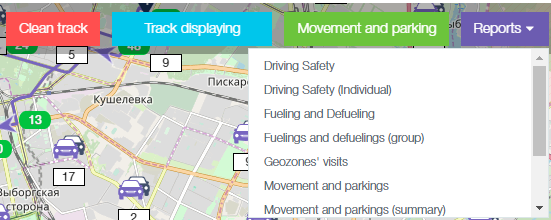
Figure 12 - Reports button